The rudder is back (almost)

Here is Carrie holding up the rudder in its final location for me to see if I need to make adjustments. It’s heavy but she’s a strong woman. Big isn’t it?

The rudder shaft has to be replaced as it was, if you remember, severely bent. 

The next photo shows how close the rudder fits against the hull. The red line shows the rough position of the shaft. The blue line shows where I have to saw it off to enable me to fit it all in. I have to modify the shaft into two pieces because of the way it will be installed. All will become clear in time. 

2nd June 2017

The astute amongst you will have noticed that today is 2 June and no announcement of launching has been made and the boat is still sitting on the banks of the river rather awry.

As you might of guessed time has taken its toll and work on the boat has not progressed as quickly as it might but we have made great strides so what have we done recently?

All bar one of the toe rails have had two coats of boat paint on them making them look beautiful.

The bowsprit has been similarly treated and is looking excellent ready for its top coat. 

The lockers internally have been given another coat of build paint.
All the internal main cabin woodwork has been sanded down ready for a coat of paint.

The deck has had its final bow section installed and bonded down.

The deck has had its bow section installed and bonded down. It is now waiting for the last two sections to be placed and it will be complete and ready for the teak deck to go down.

The cockpit sole has been rebuilt and is ready for fitting.

The area around the Rudder where it goes through the hull has been ground down ready for treatment and repair.

A decision has been made to strip out the galley because behind it all we have discovered the timber is rotten. Hay ho!

We have manufactured two new angle irons to support the cockpit and one has been fitted.

It just keeps getting better. 

I have put the launch back full year so it is now 1 June 2018. 

That should do it.

Measuring for new sails. 

How complicated can it be?  Answer – very.

The Endurance 35 is a standard design and has its sail plan logged in all sail manufacturers databases. Easy then let’s get the sails made up to those sizes. Unfortunately the existing sails are smaller than the database sizes and as sails which are too big would be a disaster we need to confirm what the rig actually can cope with.

All the info on t’internet talks about measuring the spars and rigging when up but mine is down. So point number one is “is the length the same as the height?”

Well, yes but you have to think harder.

For instance when the mast is up you just fix a tape measure to the halyard and haul until it goes no further. Then you take the clever end and read the measurement at the point where the sail fixes to the boom. You can do the same for the outer end of the boom to measure the hypotenuse which is the leech length and you can raise or lower the boom with the topping lift depending on what you fancy your head clearance in the cockpit should be.

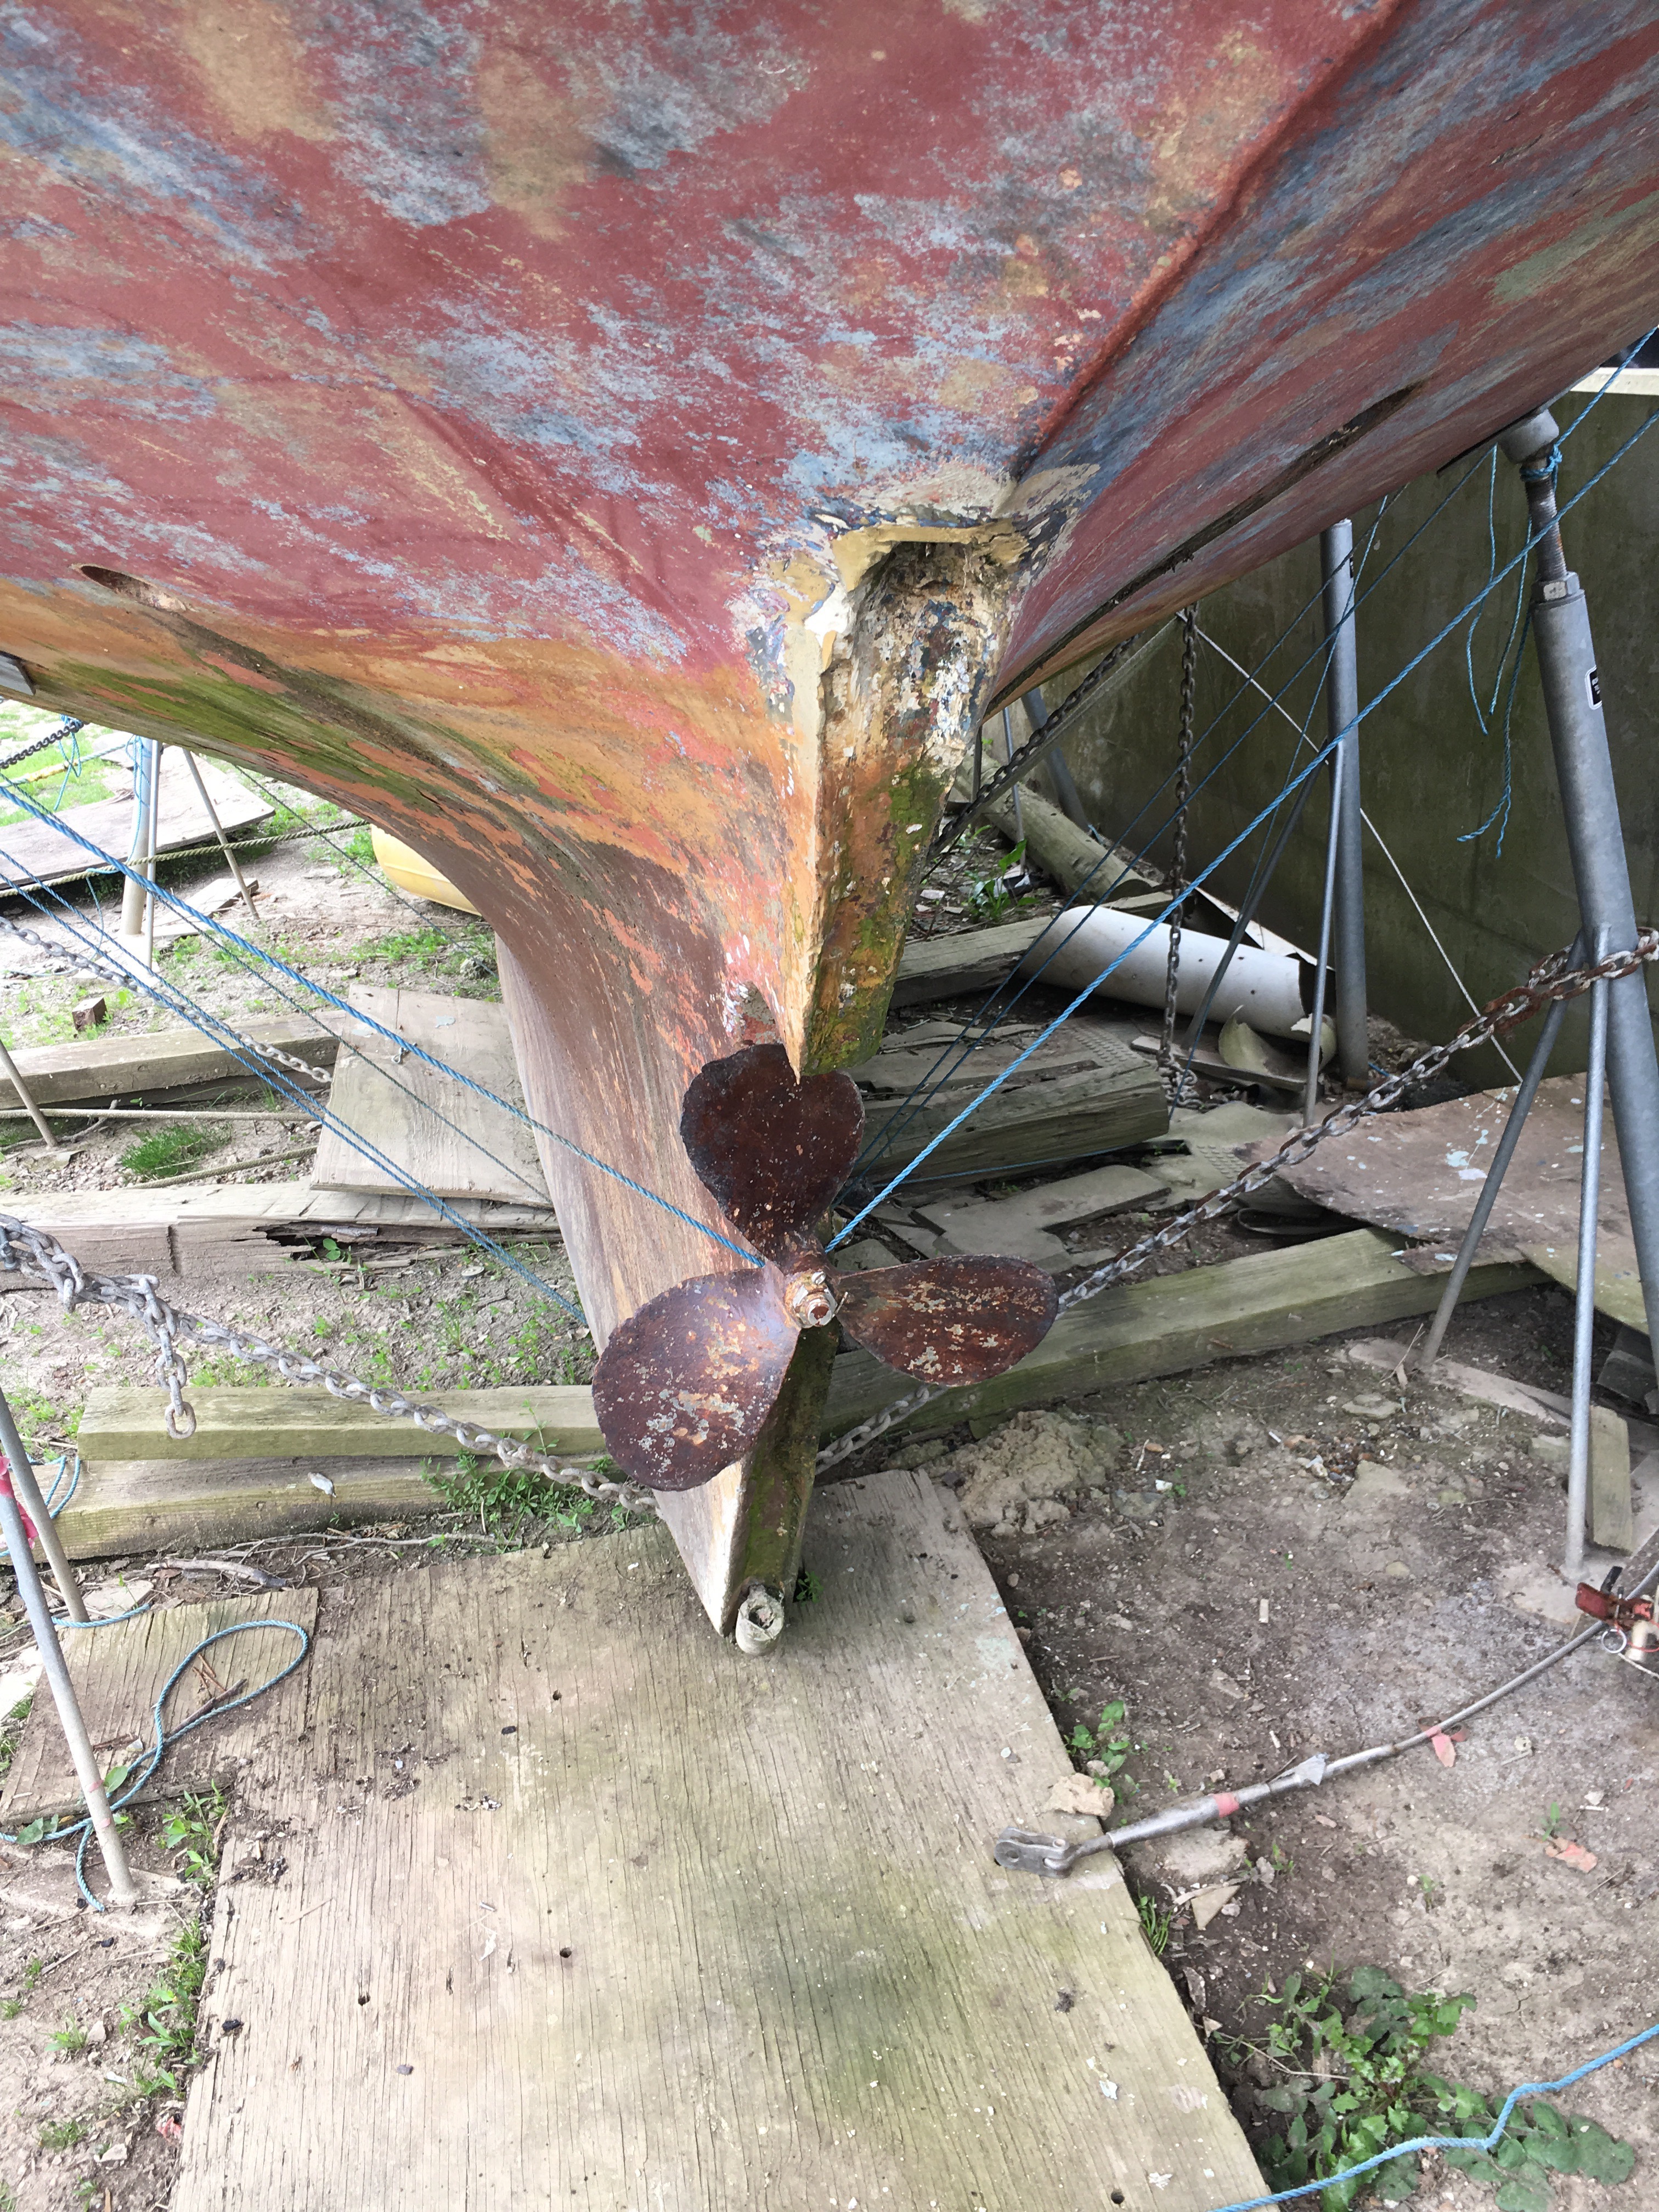
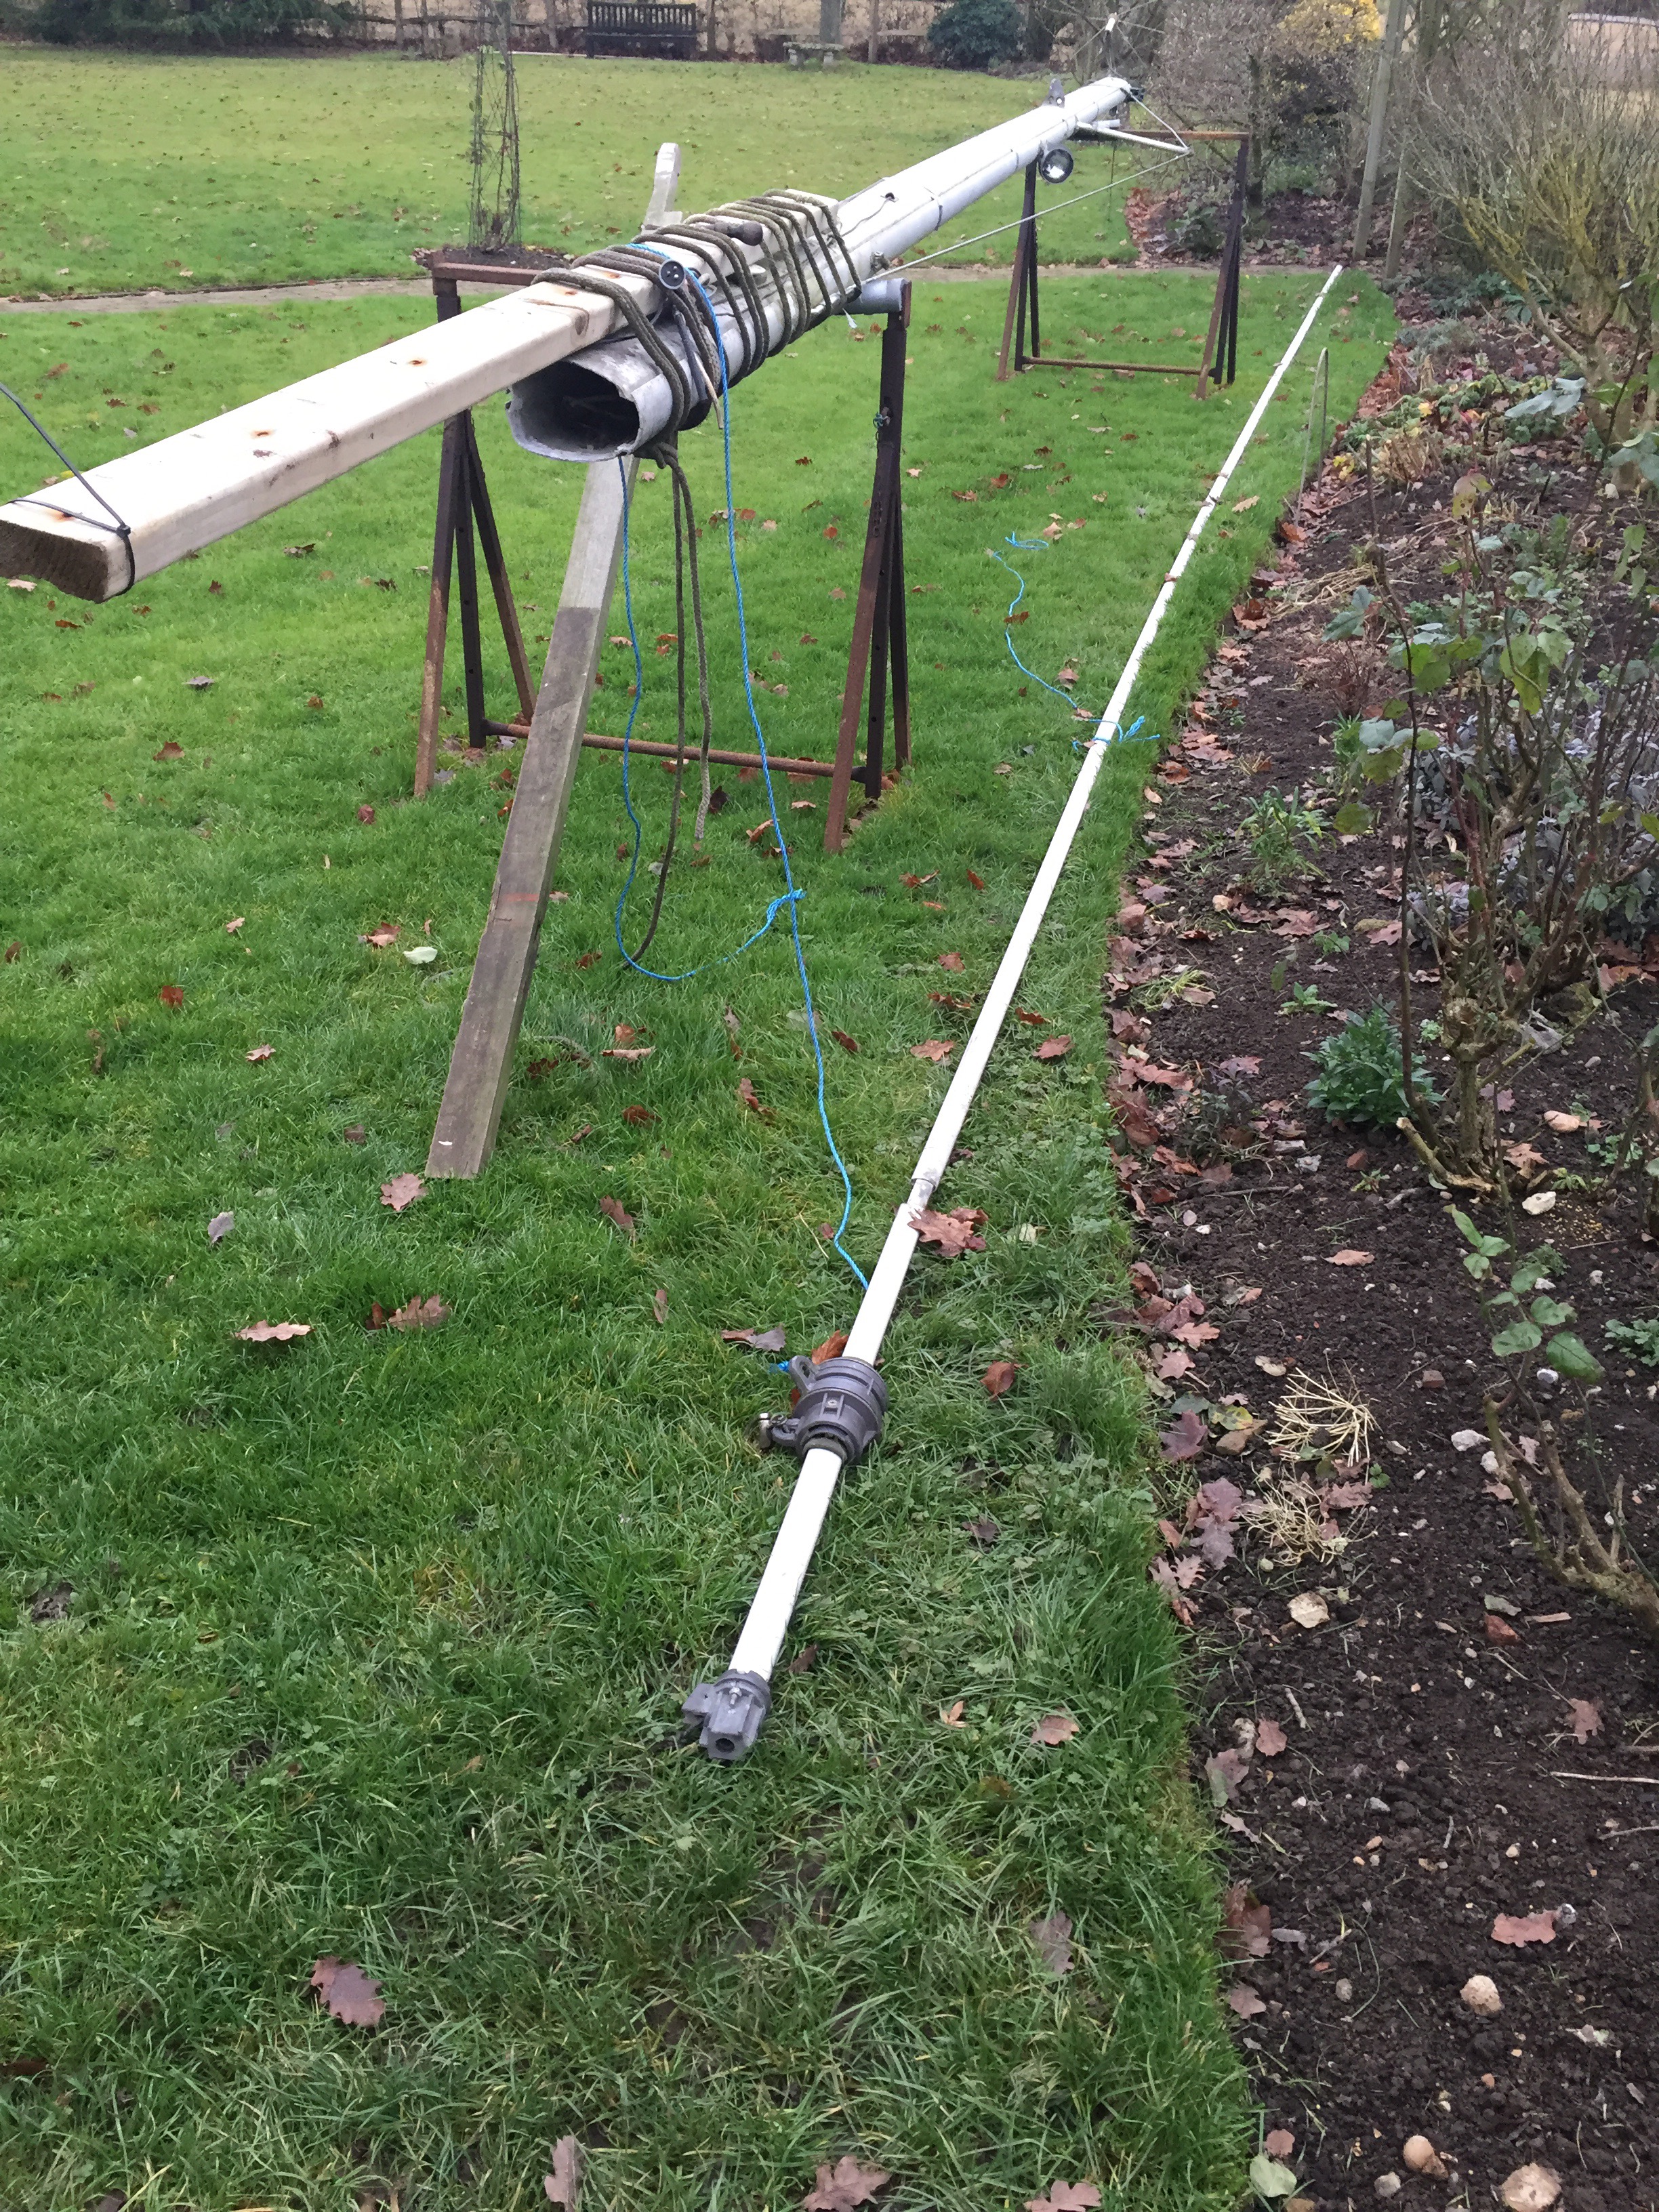
When the mast is acting as a ridge pole for a boat cover and the boom is 15 miles away at home those measurements become more problematic.

Firstly the head of the mast is a metre forward of the pulpit which sits on a one metre bowsprit, four metres up in the air.  Secondly you have to decide where the head of the sail will actually finish up. Thirdly you have to calculate the position of the boom as it is not on the boat with the mast.

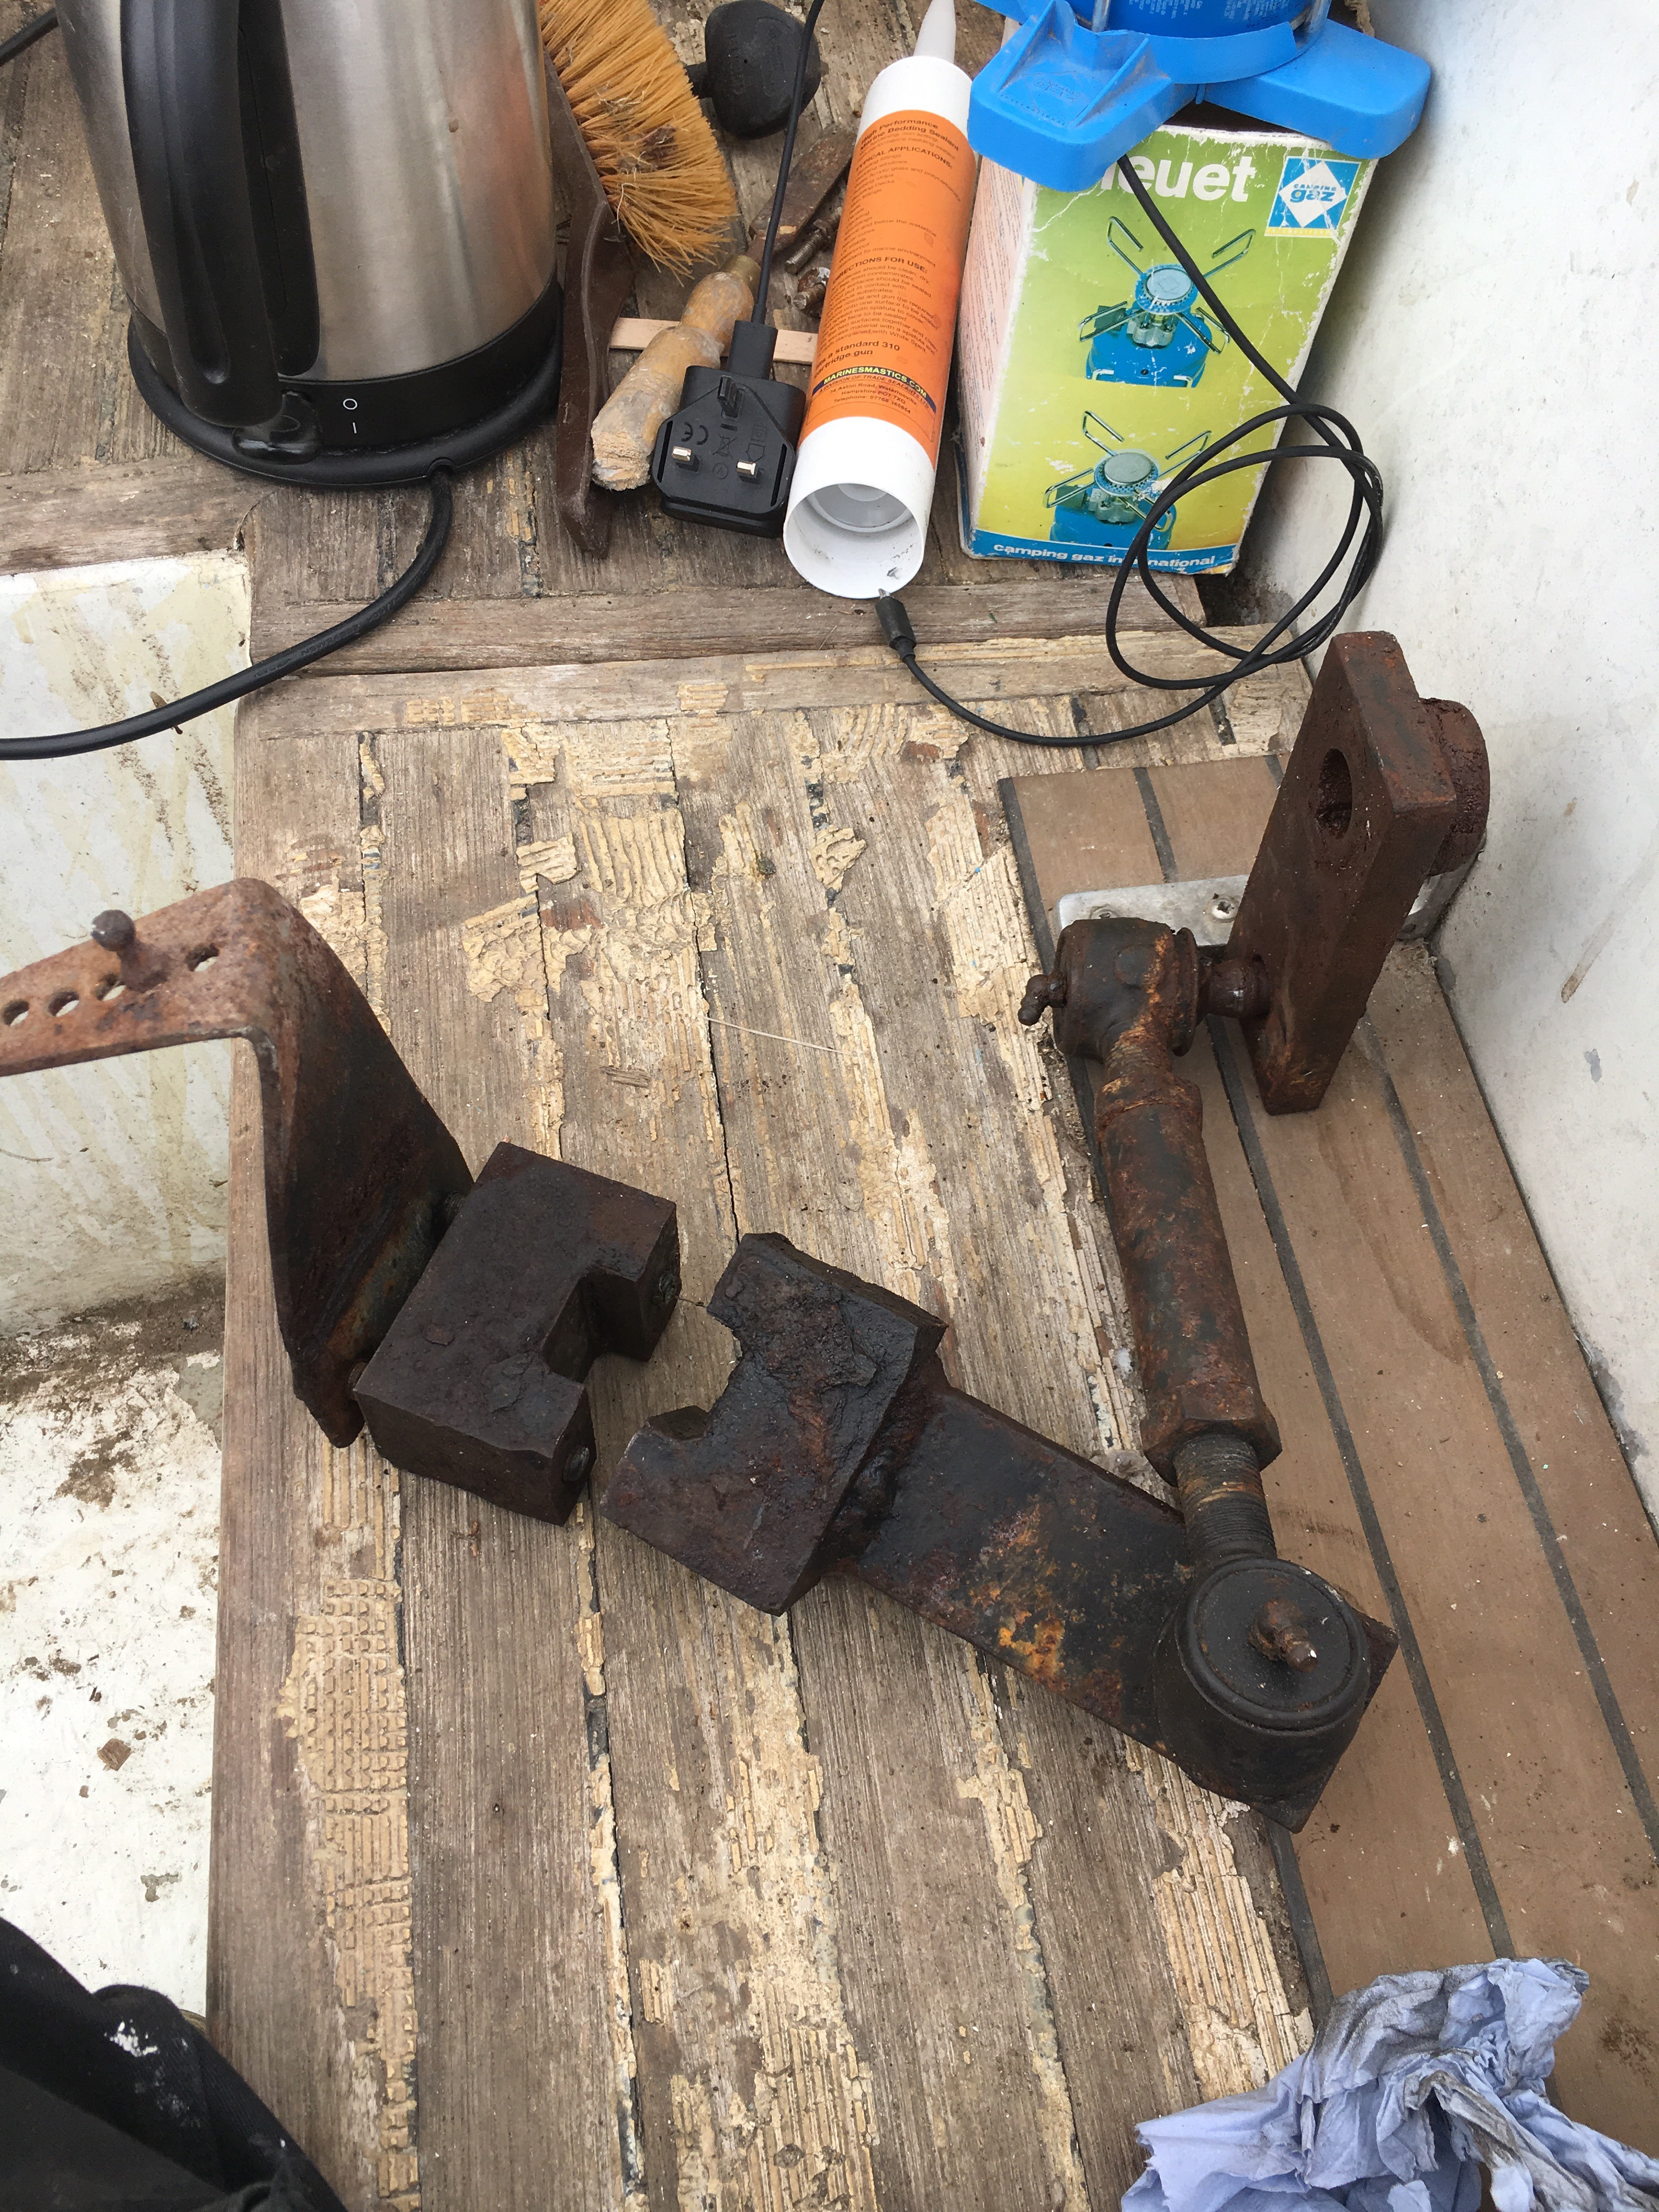
Ok I can do that but what about the boom?  I have removed the sheaves because they are corroded solid so have no exact position to start from. Establishing the point where the tack fixes to the boom is pretty easy unless like me you have dismantled the boom and gooseneck. The position of the clew is also a challenge because I have removed the sheaves through which the outhaul runs.

Then you have to measure the distance back from the mast to the tack and the distance up to the start of the mast track. The sail is not cut at right angles here because the tack is not necessarily in line with the mast track so there is a slight wedge taken out.

Then you have to measure the distances to the reefing pulleys so that the reefing points can go in to the right location on the mainsail.

All this has to be repeated for the mizzen.

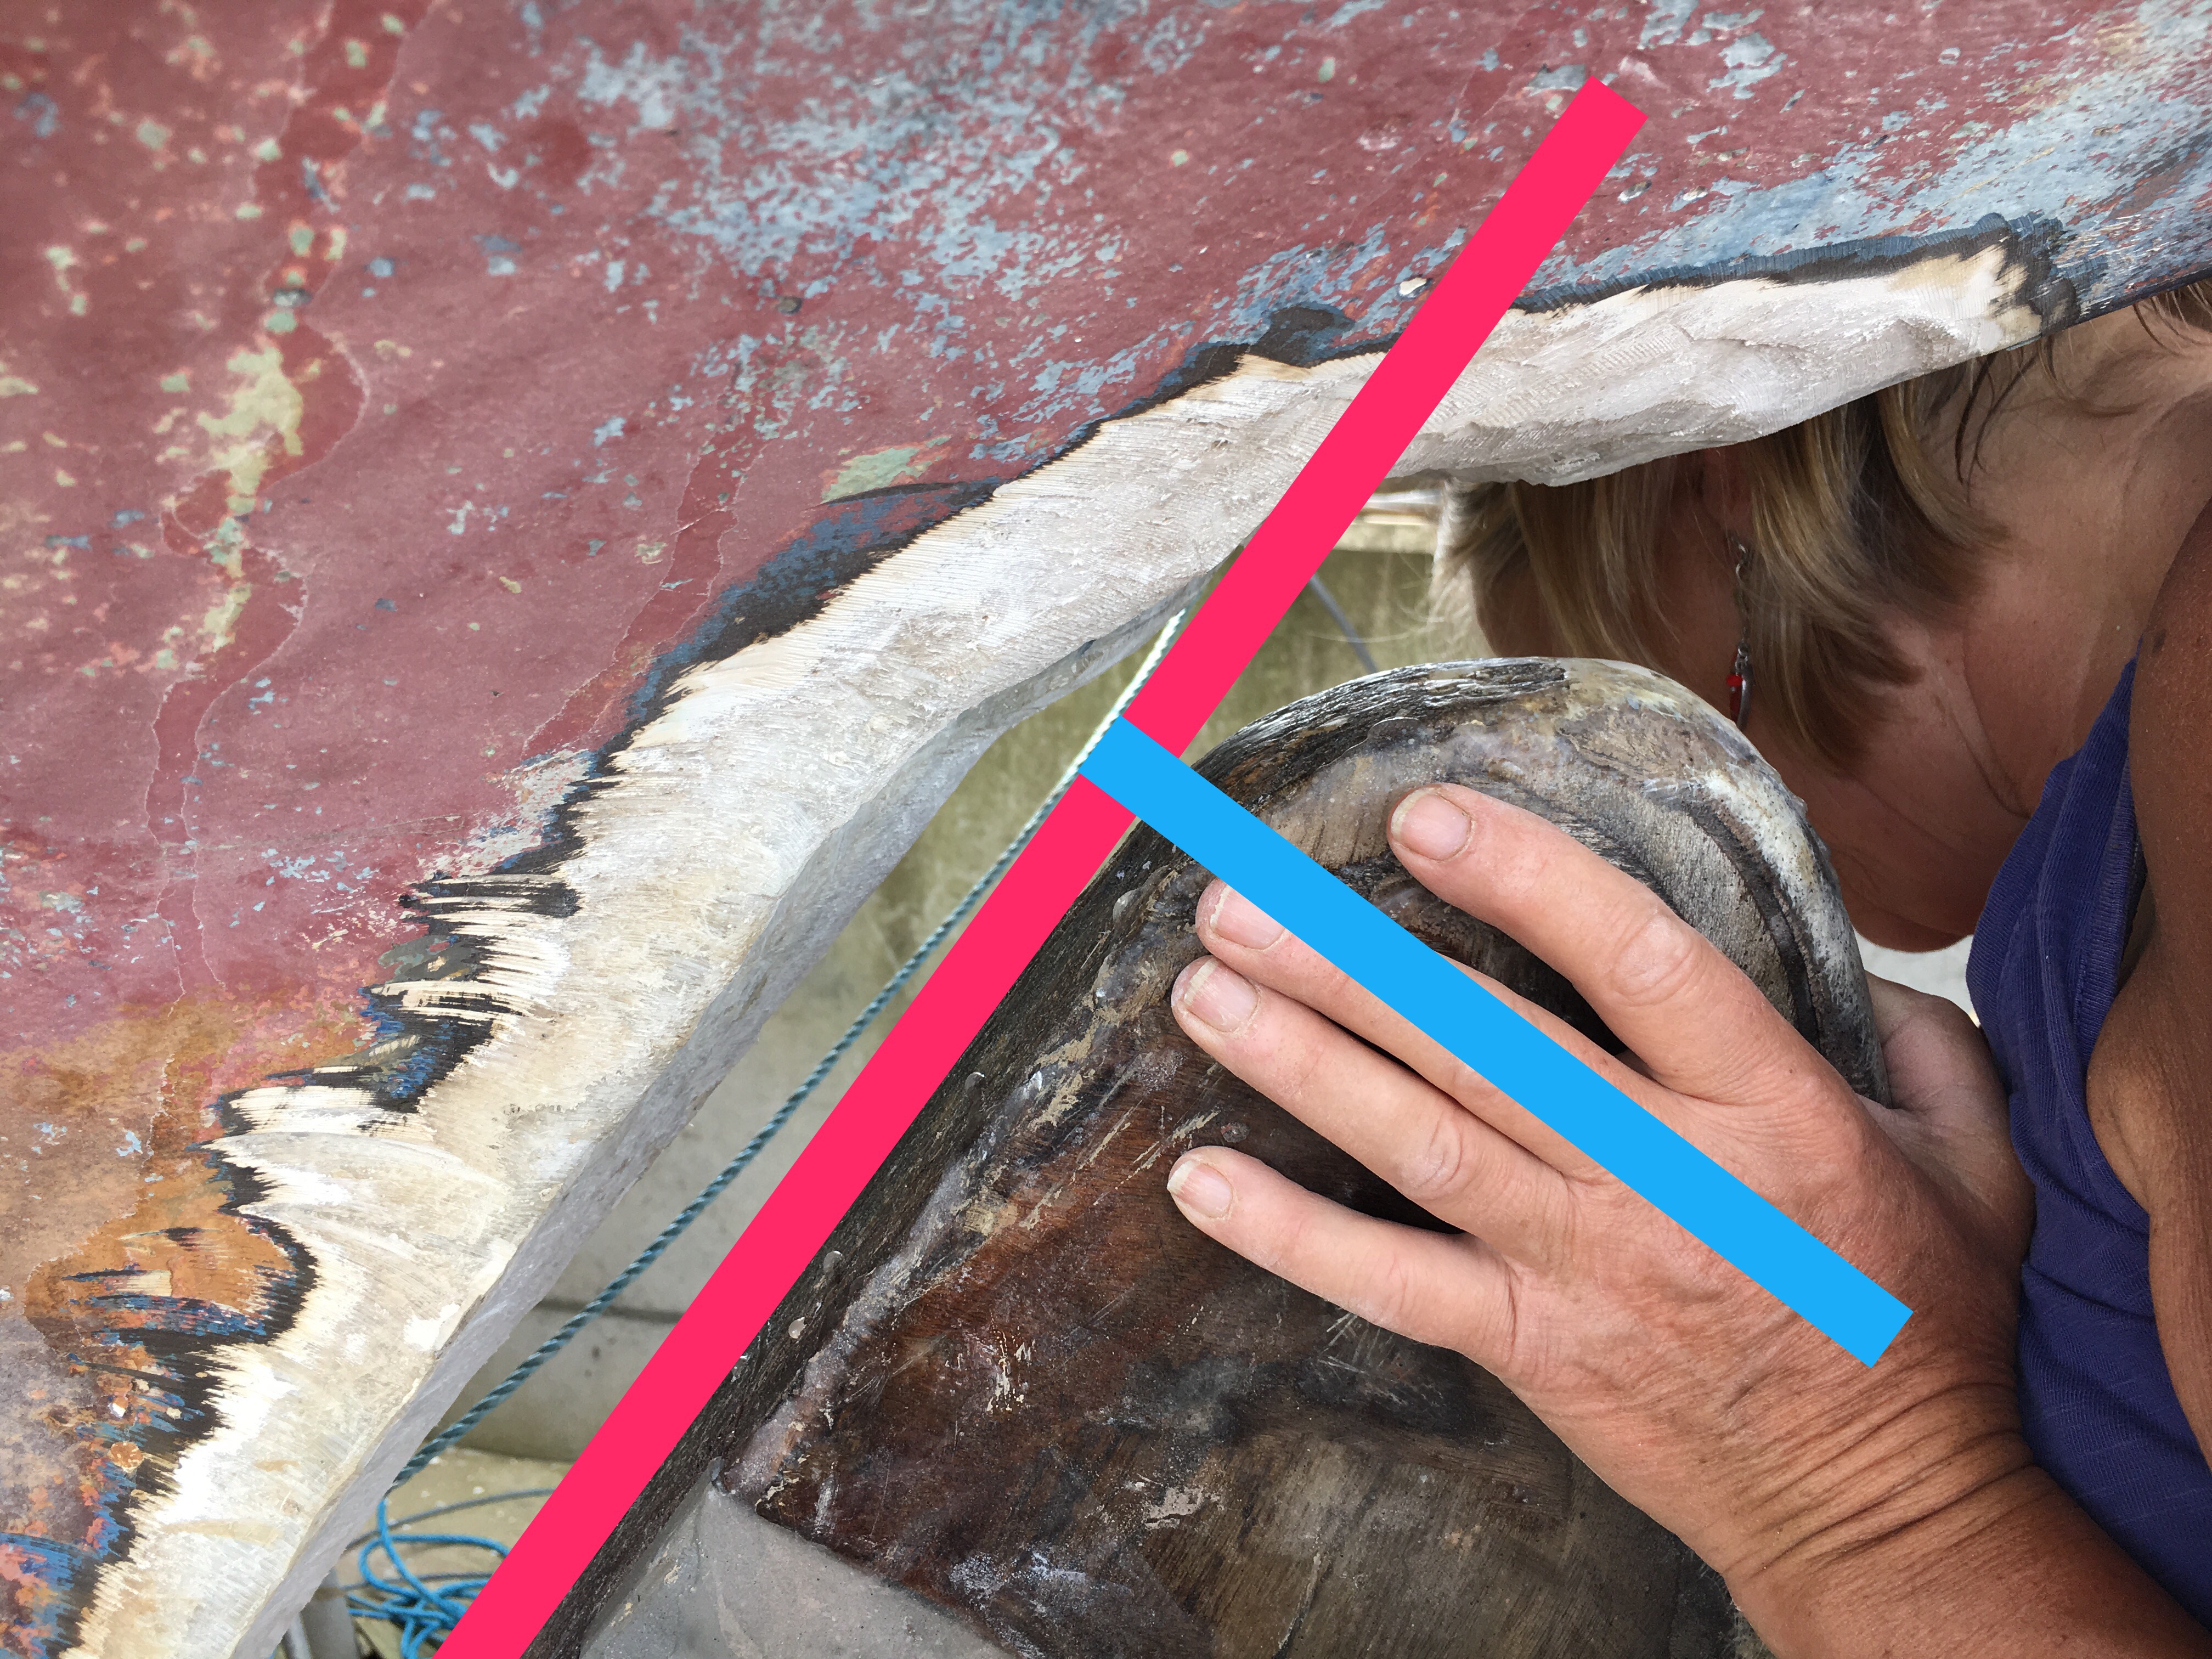
Lastly you need to measure the roller reefing fore-stay taking into account the position of the upper and lower swivels. All well and good if the top swivel actually moved along the track rather than stubbornly refusing to budge at the lowest point.

Now I realise that the sail maker will take the measurements, information, photographs and drawings and then they will look at the old sails, and then the computer data and they will come to a conclusion.  Hopefully this will result in a beautiful set of sails cut perfectly which fit like the proverbial glove.  On the other hand I might mess up a decimal point, fail to understand the subtleties of sails and end up with sails that don’t fit and that is a lot of money to risk.

i am trusting all this to Moatt Sails in Portland. A great bunch of skilled people.

Rudder shaft out

A major breakthrough today with the removal of the old and bent rudder shaft. 

It was a real pig and Chris B did the lions share of crawling in tight spaces. Once we had undone all the rusted bolts and freed the lever arm from the shaft it all dropped out. Easy!

Oxalic acid

Oxalis acid is used for many things including neutralising rust. I bought a small amount last year to help clean rust stains off the sails which didn’t work very well. 

Here however I used it on the bits of the engine mountings that I salvaged. They were caked in thick loose and flaking rust. 

Three days in a tub of acid and look what happens. Apart from going a rather disgusting green colour the rust has all but disappeared. 

The piece that is still soaking has had one end treated. 

Pretty good and now ready for painting. 

Engine mounts

When clearing out the engine bay we decided that the engine mountings could probably do with renewing. 

I found them after much searching at http://www.Parts4engines.com. They specialise in Perkins engines and have many parts for the old 4.108 models of which Anne-Marie’s is one. 

Lucky we took them off as one “fell apart in my hand Gov”. 


The nuts and bolts were rusted solid and many had to be cut off with my trusty Dremmel. 

Surprise holes

You have to keep your eyes peeled when dealing with boats.  This one, as some will be aware, has been sitting on the river bank at Rye for about ten years.  It has repeatedly been filled with rain water – hence the rot.

Now me, I would have disconnected one of the below water fittings such as the engine intake or log through hull and let the water out that way.  However previous owners did not think like that.

2017-04-05 14.57.36
Drain holes – note my screwdriver poking through!

While cleaning and painting the engine bay yesterday we discovered two holes in the hull.  Not big holes but just about enough to fit a 10mm drill through.  They can only have been created as drains but if we hadn’t found them the boat would have slowly sunk beneath the waves.  Shame no-one bothered to mention that they had drilled holes in the hull.  You might think that passing that information on would be useful.

PEOPLE!


The ‘new’ engine for Anne-Marie

Well, having decided last year that we needed a new engine – bearing in mind the condition of the old one, we bought one from Benderloch in bonnie Scotland and promptly put it in a shed.

Last weekend with the help of Joanna, Andy and engine expert Grant we got it going.

This is a very early Perkins 4.108 marine diesel engine. Look what happens!  I think we have a motor!  Assuming we can get it in through the door.

Tyler Boat Company Brochure

Here is the original sales brochure from Tyler Boat Company for the Endurance 37 from 1975 or so.  It’s what Anne-Marie will look like at relaunch.

Tyler Boat Company Endurance-37-brochure front cover
How Endurance’s were sold in 1975 or thereabouts (see brochure link for full content)

tyler-endurance-37-brochure

Malaboo of Burnham 1978 Endurance 35
Tyler Boat Company promotional photo of Endurance 35 “Malaboo of Birdham” c1978
Malaboo of Burnham Endurance 35 c 1978
Tyler Boat Company promotional photo of “Malaboo of Burnham” an Endurance 35 c 1978

 Dismantling the roller reefing

It’s been a quiet month leading up to Christmas but I bought Home the mizzenmast and the forestay complete with all the roller reefing equipment to do some maintenance. At over 12 m in length it stuck out in front of the truck along way and stuck out behind a long way too. 

I have recently discovered after much on line research that the roller reefing system is a Furlex B which is about as old as the boat.  It’s a little bit bent and needs lots of Tlc and grease but will be fine ( I hope). 

Fortunately the instruction manual is online and with a call to some rigging specialists I discovered The way to free it up. 

Basically you heat the lowest part of the gear with a blowtorch and then hit it as hard as you can with a club hammer. It was really that simple and now when I get a moment I shall take the little sections apart and store them until we put the mast back up. 

The working bit. I need to save this as to replace it is £2000!!!!
Ready for dismantling